Quality flooring starts with a stable, flat surface. A floor leveling compound is a key material used by contractors and DIY enthusiasts to create a smooth base over imperfect substrates such as concrete, wood, or cement backer board. By filling low spots, bridging small dips, and controlling moisture migration, this product helps prevent uneven wear, creaks, and premature flooring failure.
Choosing the right floor leveling compound involves considering skim thickness, drying time, and compatibility with the top flooring you plan to install, whether it’s tile, vinyl, laminate, or hardwood. For most interior renovations, a fast-setting, self-leveling formula offers a reliable balance of workability and performance. The mix-to-water ratio is crucial: too little water yields a stiff, crumbly layer; too much water slows curing and increases shrinkage risks. Always follow the manufacturer’s instructions for temperature and mixing speeds to achieve a uniform matrix.
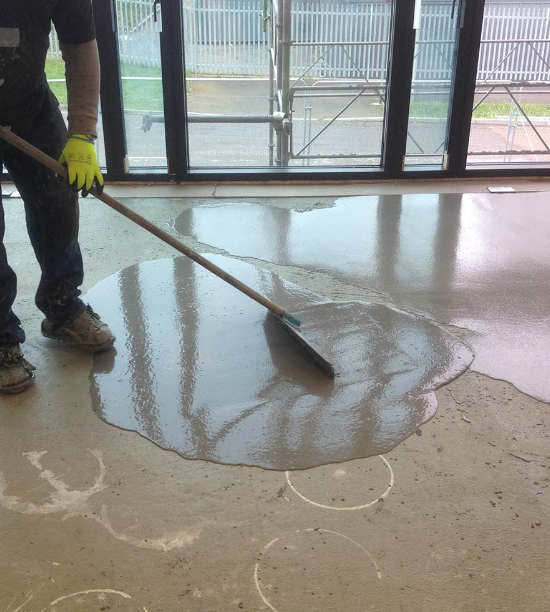
Preparation is just as important as the mix. Remove loose debris, seal any active cracks, and vacuum the surface to prevent clogs in the trowel or pump. If the substrate has high moisture, address vapor transmission with a proper sealant or primer recommended by the leveling compound supplier. A dry, dust-free base ensures the compound bonds correctly and reduces the chance of edge curling or hollow spots after cast or set.
Application technique matters too. For large areas, a self-leveling compound poured from a reservoir or pumped through a drum mixer creates a continuous, even layer. Use a gauge rake or smoothing trowel to help the material spread evenly toward boundaries, leaving a small ramp at the doorways for transitions against adjoining rooms. Avoid over-troweling, which can introduce air voids or cause the surface to pull away from walls during cure. The top surface should be marginally above the final floor height to accommodate thin overlay or floor coverings.
Curing times vary with product and climate. In cooler conditions, expect longer dry times, while high humidity can extend the set as well. Do not apply flooring until the floor leveling compound has reached the recommended hardness and moisture levels. In many cases, a thin skim coat after the first cure can address any remaining minor irregularities and produce a glass-smooth finish ready for adhesive and underlayment.
Maintenance and long-term performance depend on clean joints and proper expansion gaps around the room. If you’re retrofitting underlayment or installing heated floors, verify that the product is compatible with radiant heat and the thickness requirements specified by the flooring manufacturer. A reputable supplier will provide technical data sheets, safety data sheets, and installation guides to prevent missteps that could compromise the result. For a comprehensive overview and product specifics, visit the official supplier page linked here: floor leveling compound.
Beyond the product itself, planning and execution shape outcomes. Budget for extra material to accommodate waste and potential repairs, and schedule a clear, uninterrupted window for curing. If you prefer to browse more options before committing, you can visit the homepage of the retailer for additional tools, primers, and compatible accessories— the NewPape homepage offers resources, how-to guides, and product recommendations to support your project. Returning to the work site with up-to-date guidance helps ensure you select the right leveling compound, mix correctly, and protect your investment in a durable, flat floor.
For different substrates like concrete, plywood, or existing tile, the surface preparation steps differ. On concrete, etching or profiling may be required to improve adhesion. On plywood or OSB, a primer compatible with the leveling compound helps prevent moisture-related issues. If you’re dealing with radiant heat or a damp slab, choose a formula that is explicitly rated for such conditions and follow the manufacturer’s cooling and curing recommendations. Temperature and humidity play a big role in cure time, so plan pours for mild conditions and keep the area closed while the compound cures. If you’re unsure, consult the technical data sheets and consider a small test area before scaling up the project.