When you install doors, alignment is everything. A door hinge jig makes the job safer, faster, and more accurate by guiding drill bits and ensuring consistent spacing. If you’re upgrading your workshop toolkit or tackling a hanging project in a rental, a quality jig can save time and reduce mistakes. In this guide, you’ll learn what a door hinge jig is, which features matter, and how to use it to achieve clean, square installations that stand up to daily use.
What is a door hinge jig?
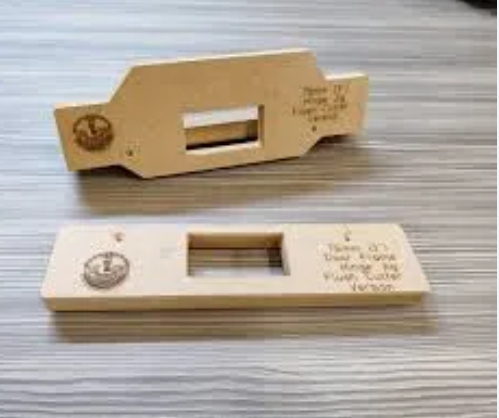
A door hinge jig is a specialized guide that clamps to the door and frames, directing drilling or routing to create perfectly positioned hinge mortises. By keeping the bits square to the surface and maintaining uniform depth, a jig minimizes misaligned hinges, uneven gaps, and tear-out. Whether you’re mounting a kitchen cabinet door, a bedroom entry, or a decorative panel, a well-made jig can pay for itself in fewer mistakes and faster setup.
Key features to look for
When shopping for a door hinge jig, consider these criteria. A durable construction, usually aluminum or steel, resists wear and maintains accuracy over time. Look for adjustable hinge spacing to accommodate different door thicknesses and frame widths. A good jig should offer preset mortise depths and a clear alignment system—often including reference lines, stops, or guages. Clamp versatility matters too: quick-release clamps or pegged guides help secure the jig without marring the surface. Finally, compatibility is essential; ensure the jig supports the hinge type you use most (concealed, butt, or overlay hinges) and works with common drill bit sizes for mortising.
Benefits for DIYers and professionals
For DIY enthusiasts, a door hinge jig reduces the guesswork involved in hinge placement, delivering repeatable results across multiple doors and projects. It also protects door faces and frames from accidental screw or drill errors. For professionals, a high-quality jig speeds up installations, improves consistency across a batch of doors, and contributes to a cleaner, more professional finish. In addition, a well-designed jig can be repurposed for other routing tasks, expanding its value beyond hinge mortises.
How to use a door hinge jig
Start by measuring the door and frame to determine hinge spacing. Secure the jig to the door edge or face, aligning its reference marks with your measured positions. If your jig offers adjustable offset, dial in the correct distance from the edge before clamping. Mark the mortise location on the door or frame, then set the drill bit depth to the recommended mortise depth. With the jig locked in place, drill straight, steady holes or router mortises. Remove the jig, check for fit by inserting the hinge, and test the door’s swing. Small adjustments may be needed, so take your time. Finally, fasten hinges with the provided screws and recheck the operating clearance and alignment. A good practice is to run a dry-fit swing on a scrap piece before committing to your actual door to avoid surprises on installation day.
Tips and common mistakes
Avoid common errors by double-checking measurements, and never relying on a single mark for all hinges. Ensure your drill bit is sharp, and use low feed pressure to prevent tear-out. If your hinge requires a complex mortise, verify that your jig’s compatibility includes that profile. Don’t rush setup—misalignment at the setup stage leads to stubborn gaps after installation. When finished, seal or touch up any exposed edges to prevent moisture ingress and reduce wear over time.
As you expand your toolkit, the right jig can become a reliable workhorse in your shop. For more detailed models and product comparisons, you can explore and compare options such as this specific guide: door hinge jig.
For more woodworking insights and project ideas, visit Publishie, where you’ll find guidance, tips, and reviews to help you choose the right tools and hardware for every job.