Basements are prone to moisture, which can lead to mold, musty odors, and structural damage. A basement wall vapor barrier is a simple, effective defense designed to limit the movement of water vapor from the soil into the concrete wall and indoor air. By controlling vapor transfer, homeowners can reduce humidity levels, improve air quality, and create a more comfortable living space. This guide explains what a basement wall vapor barrier is, why it matters, and how to choose and install one properly.
What is a basement wall vapor barrier?
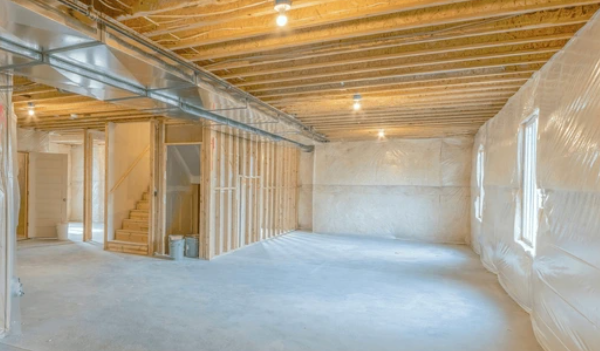
A basement wall vapor barrier is a barrier layer installed on the interior or exterior side of basement walls to slow or stop the diffusion of water vapor from damp soil into the cooler indoor air. Common materials include plastic polyethylene sheeting, foil-faced membranes, or composite barriers designed to resist moisture transmission. The barrier is typically installed with careful overlaps, seals at edges, and proper ventilation considerations to prevent trapped moisture behind the wall. The goal is to keep the indoor environment drier and less conducive to mold growth while protecting insulation and structural components.
Why it matters for your basement
Moisture moves from areas of higher humidity to lower humidity, and soil in contact with basement walls often contains humidity that can migrate inward. Without a barrier, that vapor can condense on cooler surfaces, promoting mold, wood rot, and peeling finishes. A properly installed basement wall vapor barrier helps maintain a stable relative humidity, reduces the risk of damp patches, and supports energy efficiency by allowing insulation to perform as designed. For homeowners who finish basements or use them as living space, a barrier can contribute to a healthier, more durable home environment. A basement wall vapor barrier is a common solution when dealing with moisture intrusion in below-grade spaces.
Choosing the right material
Material choice depends on climate, wall construction, and whether the barrier is installed on the interior or exterior. Key options include:
- 6 to 10 mil polyethylene plastic sheets for interior applications, offering good moisture control and cost efficiency.
- Foil-faced or multi-layer membranes for added durability and insulation compatibility in colder climates.
- Barrier tapes and sealants designed to create airtight seams at overlaps and around penetrations.
- Combination systems that pair a vapor barrier with a vapor-retardant insulation layer for enhanced performance.
When selecting a product, consider compatibility with existing insulation, potential for ventilation issues, and the local building codes. Consulting a professional can help ensure the chosen barrier meets structural and environmental needs while providing long-term protection.
Installation essentials
Installing a basement wall vapor barrier requires careful planning and attention to detail. Start by preparing the wall surface: repair cracks, clean dust, and ensure any plumbing or electrical penetrations are properly sealed. Measure wall heights and cut the barrier material with a margin for overlaps. Install from bottom to top, using appropriate fasteners or adhesive to hold the barrier in place, and seal all seams with approved tape or sealant. Pay special attention to window wells, door frames, and pipe penetrations to prevent gaps that could leak moisture. If a finished interior exists, the barrier should be installed in a way that allows for later insulation and drywall without creating gaps.
Keep in mind that interior barriers may need a drainage plan or a gap to allow any trapped moisture to escape. Exterior barriers, when feasible, can offer direct moisture control from the soil side but often require more extensive construction work. Regardless of approach, ensure a continuous, sealed layer along the entire wall to maximize effectiveness.
Maintenance, costs, and next steps
Maintaining a basement wall vapor barrier involves periodic inspections for tears, gaps, or compromised seals, especially after any renovation or wall movement. Small repairs, such as resealing seams or patching punctures, can extend the barrier’s life. Costs vary based on material choice, wall area, and labor, but a well-installed barrier is a cost-effective investment compared with ongoing moisture-related damage. For more resources and product options, consider visiting the WebDorbit homepage.