A well-organized pantry saves time, reduces food waste, and makes weeknight meals feel effortless. DIY pantry shelves give you control over every inch of space, letting you customize height, depth, and spacing to fit your family’s needs. Whether you’re starting from a closet, a corner alcove, or an empty alcove in the kitchen, a thoughtful shelving system can transform clutter into clarity. This guide covers planning, materials, and steps to bring your project from concept to a sturdy, attractive storage solution.
Plan your space
Begin by measuring the available footprint and noting any obstructions such as outlets, doors, or light fixtures. Create a rough sketch that shows where shelves will go, how tall their tops should be, and what items will occupy the most space (cans, boxes, bottles, or small appliances). Decide between fixed shelves, adjustable options, or a combination of both. If you expect to rotate containers or store taller items, include extra headroom and consider using sliding or pull-out organizers for hard-to-reach corners.
Choose durable materials
For most DIY pantry shelves, solid wood or high-quality plywood with a durable finish offers long-lasting strength. If you’re aiming for a lighter build, sturdy MDF or pine can work well, especially when paired with metal brackets or cleats. Plan shelving thickness based on span: 3/4-inch plywood or 1-inch solid wood works well for most standard spans up to 36 inches. For heavier cans and bottles, reinforce with steel brackets or add a backboard to prevent sagging. Don’t forget edge banding or trim to create a finished look that complements your kitchen.
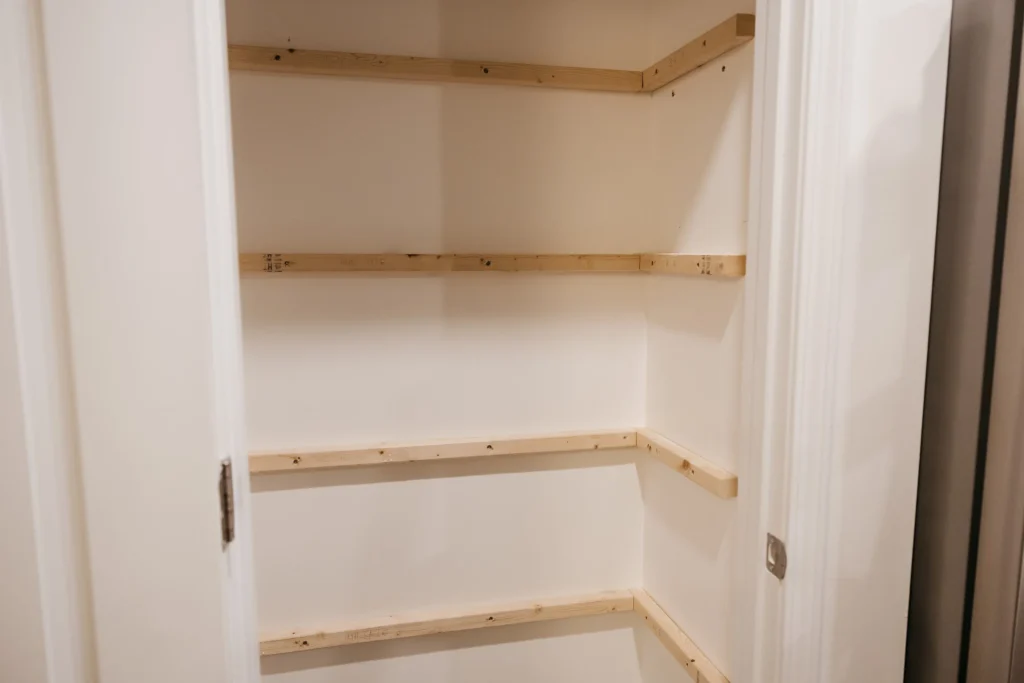
Step-by-step to build your shelves
Start with a simple, repeatable pattern: cut your shelves to the desired depth, install cleats or brackets at uniform heights, and then mount the shelves level. Use a stud finder to anchor any wall-mounted components securely. If you’re building free-standing shelves, construct a sturdy frame, add cross-bracing, and finish with a protective sealant to resist humidity and kitchen grease. Sand between coats and apply a durable finish or paint that matches your cabinetry. When in doubt, assemble a small test section to verify alignment and load in real-world conditions before completing the entire run.
Design options to maximize every inch
Open, adjustable racks are versatile for canned goods and dry goods, while pull-out baskets excel for snack packs and baking supplies. Corner shelves or lazy susans help reclaim awkward spaces, and a shallow top shelf can hold lightweight items like lunch boxes or paper towels. If your pantry doubles as a prep area, consider a removable work surface or a narrow island with built-in shelves for quick access to frequently used ingredients. Finishing touches like labeled bins, uniform containers, and consistent spacing create a visually calm, organized space that’s easy to maintain.
For readers seeking a curated plan, you can explore a ready-made guide by visiting DIY pantry shelves and drawing ideas from practical layouts and measurements.
Beyond building, small organizational habits can keep your pantry efficient: group similar items, rotate stock so no item sits unused, and place daily staples at eye level. Add LED lighting or motion-activated strips to keep shelves visible in dim corners, and label shelves or containers to make re-stocking a breeze. With careful planning, your DIY pantry shelves will become a dependable hub for daily meals and special occasion cooking alike.
To explore more home improvement tips and design inspiration, visit RoomDome for ideas, guides, and tutorials that can help you tackle future projects with confidence.