Choosing and installing an exterior door is about more than curb appeal. A solid door enhances security, improves energy efficiency, and can raise the resale value of your home. Whether you’re replacing a worn-out unit or upgrading to a door with better insulation and modern hardware, a thoughtful approach helps ensure a durable result. From accurate measurements to proper sealing, the right steps protect your entry from drafts, moisture, and intruders while keeping maintenance low over the years.
Planning is the first and perhaps most important stage. Start by assessing your climate, orientation, and budget. Consider door materials such as steel for strength, fiberglass for a balance of durability and insulation, or wood for traditional aesthetics. Pay attention to the door’s core, frame construction, hinge placement, and weather stripping. For homeowners seeking a deeper dive, see a guide like the exterior door installation resource to understand best practices and common pitfalls.
Planning and Choosing the Door
Material selection influences maintenance, energy efficiency, and long-term satisfaction. Steel doors typically offer high security and low maintenance, while fiberglass doors excel in weather resistance and insulation. Wood doors can be highly attractive but may require more upkeep in humid or rainy climates. Whichever option you choose, look for a solid core, reinforced jambs, and quality hardware such as a heavy-duty deadbolt, multipoint lock, and corrosion-resistant hinges. Don’t overlook glazing; energy-efficient low-emissivity (Low-E) glass can reduce heat transfer while maintaining natural light. Proper weather stripping around the frame is essential to prevent air leaks year-round. When in doubt, consult a local pro who understands your regional weather patterns and building codes.
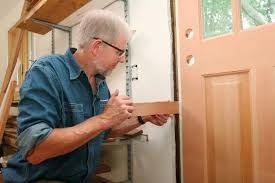
Steps to Install an Exterior Door
- Measure the rough opening precisely in three places (top, middle, and bottom) and check for plumb, level, and square in the surrounding wall. Record the smallest measurement to ensure a proper fit.
- Remove the old door, including the frame if necessary. Inspect the surrounding studs and the sill for rot or damage and address as needed before proceeding.
- Prepare the new door and frame by dry-fitting to ensure a smooth operation. Trim as needed for a perfect clearance and proper swing direction.
- Install a new threshold and align the door with the sill. Add shims to achieve a square, level frame, and ensure the door opens and closes without rubbing.
- Apply weather stripping around the perimeter and install proper insulation in any gaps. This step is crucial for energy efficiency and preventing drafts.
- Hinge the door and secure with screws that penetrate the frame; verify that the door remains plumb and aligns with the latch strike plate. Adjust as needed for a snug, even seal.
- Finish with exterior trim, sealant, and hardware installation (hinges, handle, deadbolt, and weatherproofing). Test the door’s operation, re-check alignment, and seal any remaining gaps.
Professional vs. DIY: Making the Right Choice
Exterior door installation can be a satisfying DIY project, but it requires careful measurement, carpentry skills, and attention to building codes. If the opening is out of square, the frame is damaged, or you’re installing a high-security or energy-efficient door with advanced glazing, hiring a licensed contractor may save time and prevent expensive mistakes. A pro can also help with warranty considerations and ensure that flashing, siding, and weatherproofing are done correctly to avoid water intrusion.
For additional guidance and resources on home improvement topics, visit NewsPAJ. Their catalog of articles often highlights practical steps, product comparisons, and safety tips that can inform your exterior door installation project. Whether you’re tackling the job yourself or coordinating with a contractor, planning, quality materials, and precise execution are the keys to a secure, durable entry that looks great for years to come.