Refresh your bathroom without a full remodel by repainting tile. Painting bathroom tiles can transform a dated or stained look into a brighter, fresher space. This guide covers why painting is a viable option, what you’ll need, and step-by-step instructions to get a durable, clean finish that resists humidity and moisture. If you’re curious about the broader renovation tips on the site, you can also explore the HausFixr homepage for additional ideas and budget-friendly solutions.
Why choose tile painting for a bathroom update
Painted tile is a cost-effective alternative to retiling. Quality epoxy or ceramic tile paints create a sealed surface that cleans up easily and resists mildew in a humid bathroom. It’s especially useful for bathrooms with glossy ceramic or porcelain tiles where darker grout stains are hard to remove. While painting won’t fix structural issues or severely damaged tiles, it can dramatically improve color, reflection, and perceived cleanliness with a comparative effort and price.
What you’ll need
Gather supplies before you start. A typical kit includes:
- Tile primer (water-based or epoxy, depending on paint type)
- Tile paint designed for bathrooms (epoxy or acrylic enamel)
- Sealant or clear topcoat for moisture protection
- Paint rollers, brushes, and painter’s tape
- Sanding block or fine-grit sandpaper
- Degreaser or TSP substitute, rubber gloves, and eye protection
- Masking for grout lines (optional) and a breathable drop cloth
Preparation: the secret to a lasting finish
Preparation determines long-term durability. Start by cleaning tiles thoroughly to remove soap scum and oils. A degreaser or TSP solution works well, followed by a clean rinse and let tiles dry completely. Lightly sand glossy surfaces to create a rougher texture for better paint adhesion, then wipe away dust. Protect surrounding fixtures and grout lines with masking tape. If you want to keep grout color, you can tape off the grout and plan to seal or repaint it separately after the tile has cured.
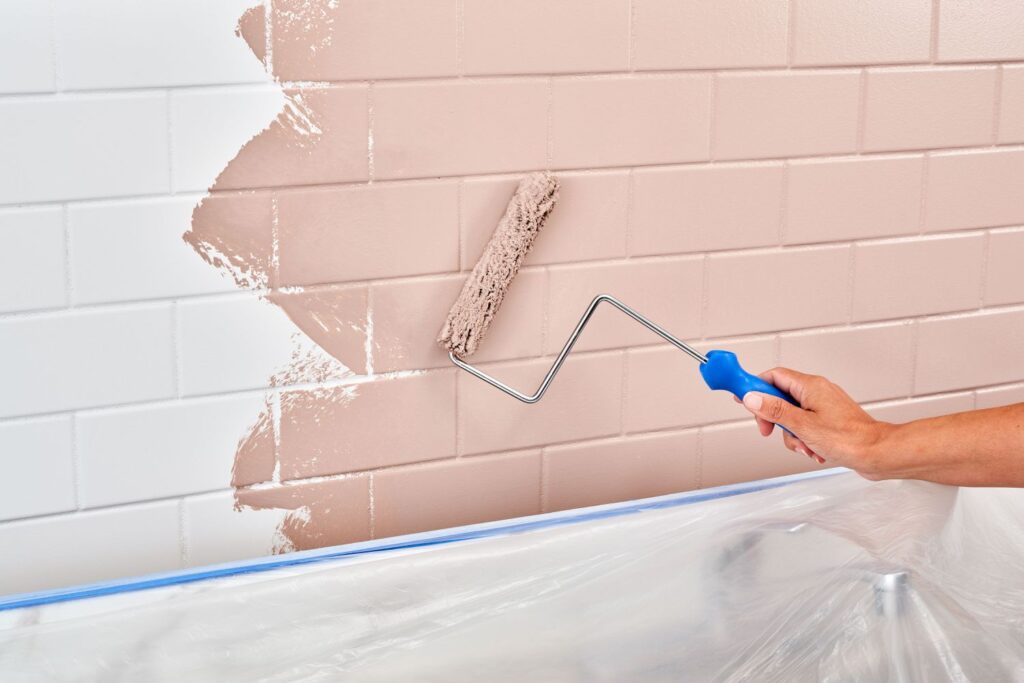
Step-by-step: how to paint bathroom tile
- Apply a high-quality tile primer suited to your paint type. Let it dry per the manufacturer’s instructions.
- Apply the first coat of tile paint with a foam roller for even coverage. Use a brush for edges and corners. Allow proper drying time between coats.
- Inspect for thin spots and touch up as needed. A second coat usually yields better color depth and a more uniform finish.
- If using grout or accent lines, repaint or seal them after the tile paint has cured. Some homeowners prefer leaving grout white and sealing it later for contrast.
- Finish with a clear topcoat or sealant designed for bathrooms to enhance moisture resistance and longevity. Follow the product’s cure time before exposing the surface to water.
Maintenance and care
Maintain your painted tile by using non-abrasive cleaners and a soft cloth. Avoid harsh solvents and scouring pads that can wear down the finish. Wipe down surfaces after showers to minimize soap buildup. Plan for touch-ups or a refresh every few years, as high humidity and cleaning frequency can wear down paint faster than in dry areas.
Cost and time considerations
DIY tile painting is typically more affordable than retiling, with costs mostly tied to materials. Expect a compact bathroom to take a weekend, including drying times between coats. If you’re unsure about color selection or product compatibility, start with a small test area to visualize the final look before committing to the full project.
For more techniques and product recommendations, visit the article linked above, and explore additional guides on the HausFixr site to tailor the project to your space and budget.